Did everyone have a fantastic weekend? Mine was extremely productive - So happy to have some energy back! Those commutes to and from Salt Lake City have been whooping my arse for the last few weeks and the result was = no result... for anything!
During my last reveal, my Living Room, I mentioned that I began yet another makeover project: the destination o' junk, future guest bedroom. I felt bad that I often sent my guests to the sofa or to the den where a blow up mattress would deflate over night (sorry, Alex and Joyce!).
Before

Due to budget restrictions, this took a little over a month and a half to complete. Being the impatient person I am, this delay was utter torture for me! Bad host, no more! I present to you....
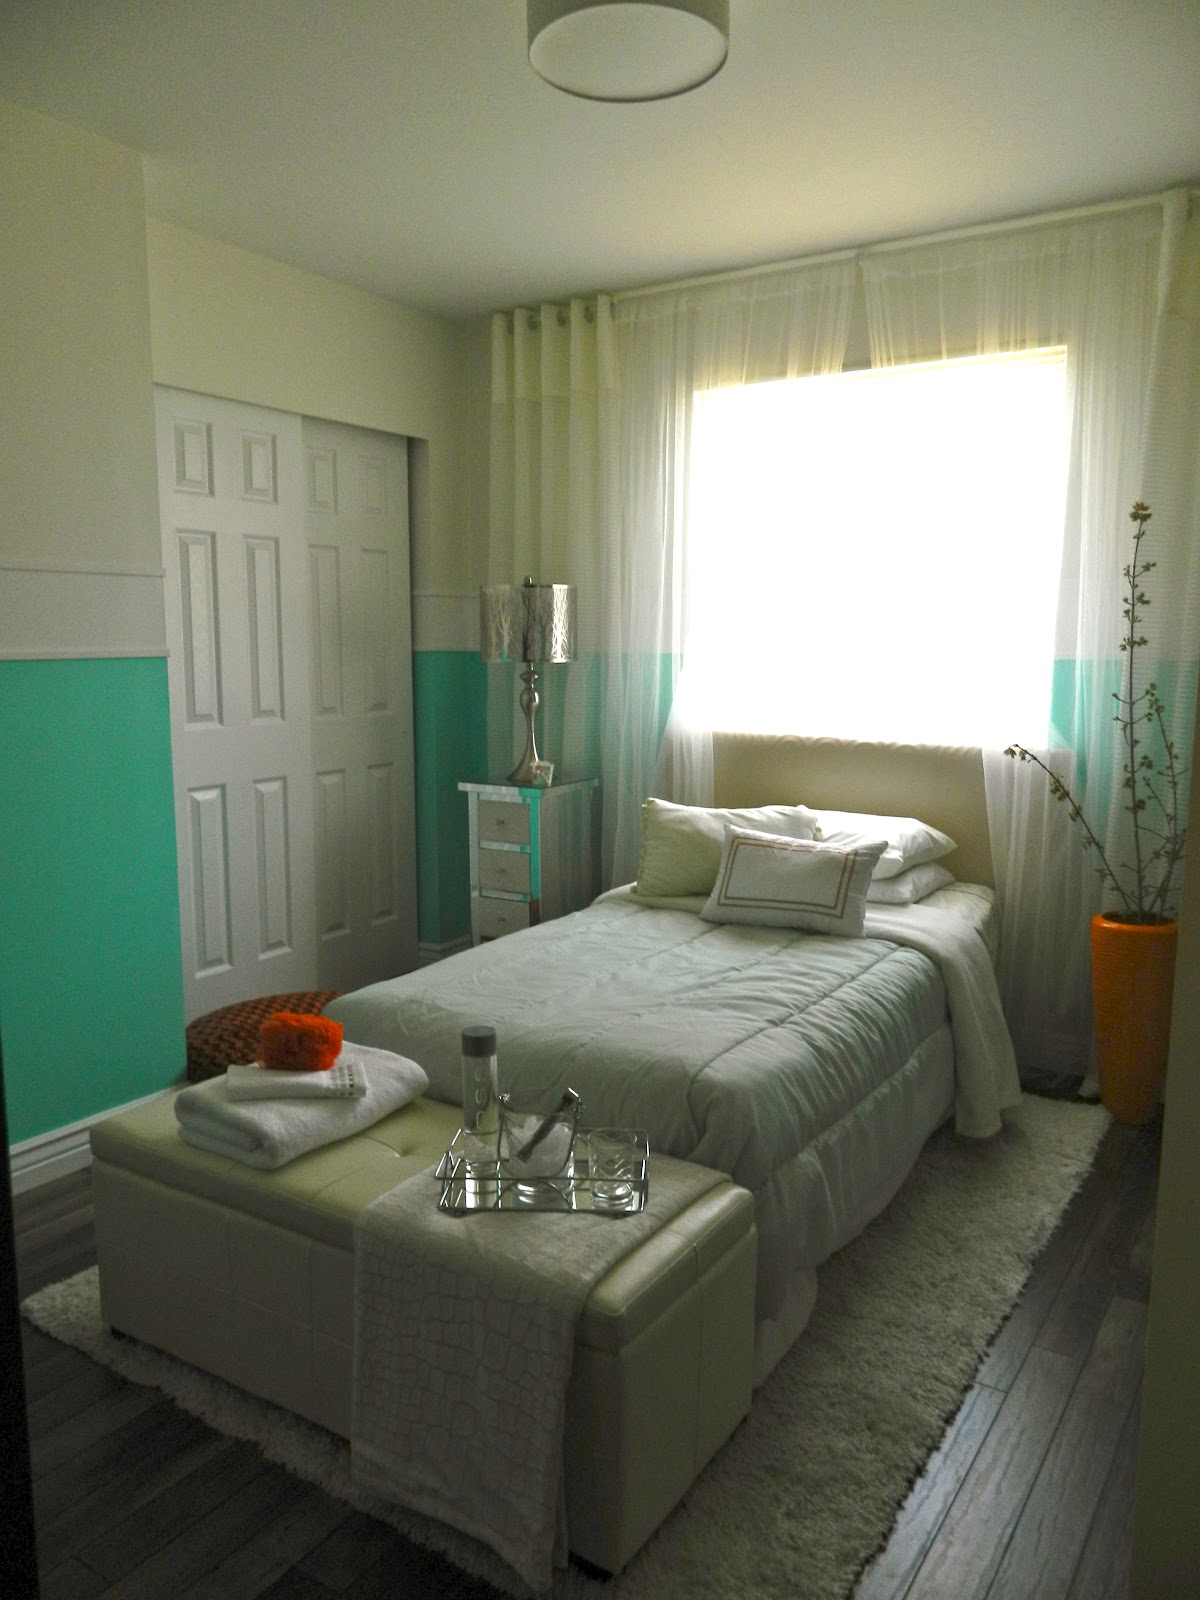
Our Guest Bedroom
I was giddy with joy this morning when everything fell into place.

What did we change, you ask?
Painted the room three different colors:
Top Half: Treasured Moment by Glidden
Middle Strip and Trim: White
Bottom Half: Bali Hai by Glidden
To see where I got my inspiration see my Color Palette Inspiration post.
Installed new flooring
Threw away the "booby" light fixture and installed a new, more classic one.
Made my own headboard
Added some guest friendly furniture and fixtures
and of course... eye candy.
 |
| There's also an open bar in the kitchen, if sparkling water doesn't cut it for you. |
No hurdle is too large, I say! Let's just make one and still have room!
 |
| The most inexpensive built-in ever made! Bookshelves, which I painted white : $20 ea from Walmart, 1' x 4' piece of wood and mounting pieces: $10 from Lowes = $50!!! What?! That's so cheap, it's obscene! |
 |
| Stool: $5 from IKEA, Mirror: $35 from Ross |
 |
| Just enough space for makeup and jewelry storage. |
Just a little bouquet I threw together from my tulip explosion is the front yard.
 |
| I am *smitten* with this journal! My out-of-town visitor, if he/she chooses can write about his/her Utah experience and also use it as a mini scrapbook. |
 |
| Lovin this fab $3 vase from Marshalls. |
 |
| Aren't the pugs cute? |
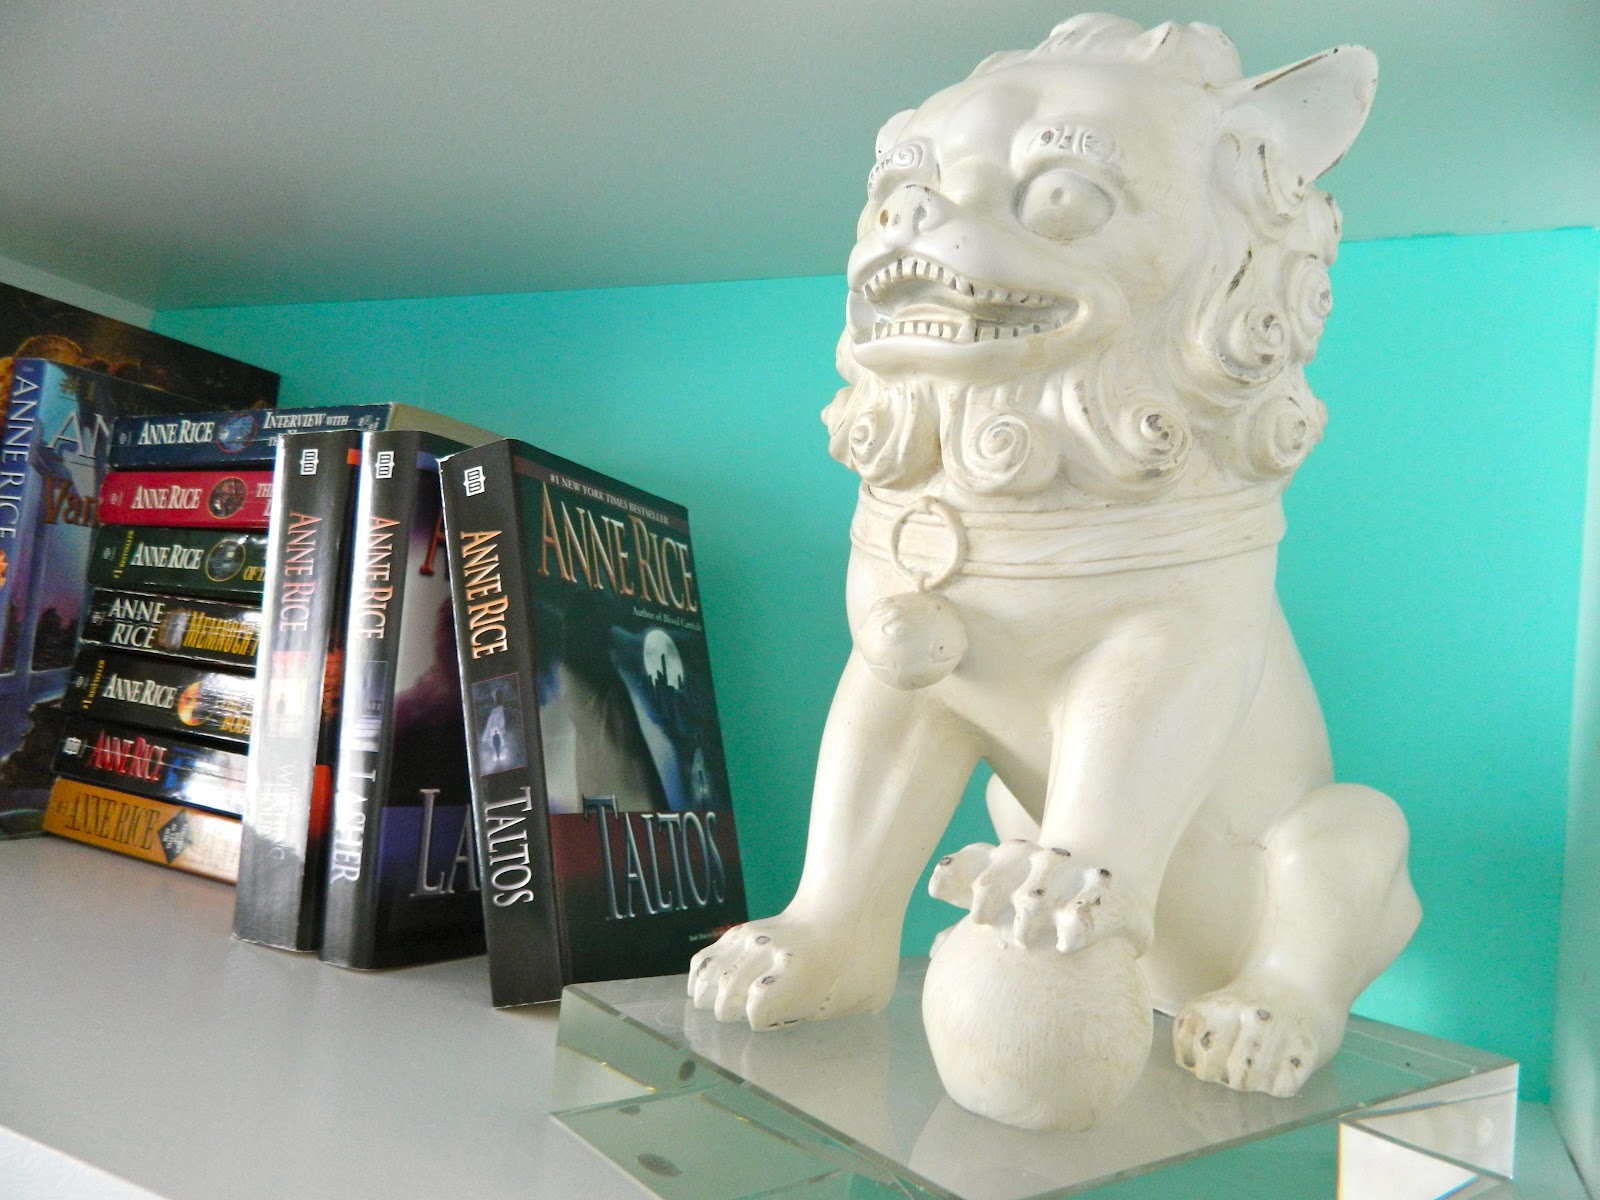 |
| Did you know the "Foo-Dog" is actually a "Foo-Lion"? I like to research all that I'm obsessed with. |
 |
| Touch of vintage and Asian-flair. |
Just a little sumpin sumpin contemporary that I whipped up.
 |
| In Utah, you can have both city and excellent mountain scapes at the same time. |
 |
| I made sure to include all of Mr. Smitten and my fave books. |
 |
| My Maple tree and a few snips later.... instant jumbo vase filler and money saved! |
 |
| My very first upholstery job. Not perfect, but damn proud of it! |
 |
| $35 elephant garden stool from Ross |
 |
| ...and one of my favorite decor magazines has made its home on top of it. |
 |
| I find myself humming "Isn't she lovely.." every time I'm around her. |
 |
| My favorite lamp to date. |
A note to friends and family extremely missed by moi, this is for you.

Come... and stay awhile....
~*Abigail*~
<a href="http://tipjunkie.com/" target="_blank"><img src="http://www.tipjunkie.com/images/TipMeTuesdayButton1.png" alt="Tip Junkie handmade projects" border="0"/></a>