Saturday, May 25, 2013

Behind the Scenes: Formal Living Room Credenza


The Formal Living Room was the latest project that I've shared with you.  Today, I'd like to show you how to make a regular paint makeover extra special.  I absolutely love how mine turned out because it literally cost me close to zero dollars out of my pocket.  Just a little time and patience was all I spent.


I found this on KSL Classifieds for FREE (I heart that word) in Morgan, Utah.  It's about 30 years old, made out of particle board and laminate sheeting - It was ugly, BUT as I always do - I looked past the superficial points and saw the potential: this sucker was heavy and in good shape.  This may last another 30 years!


The problem I was trying to hurdle was that I wanted the "wood grain" to be visible after painting.  Since there is no actual wood grain on laminate sheeting, I had to improvise...


Elmer's Glue All is a wonderful wonderful invention

I decided to make my own wood grain effect, but a raised and not inverted one.  I traced and made my own grain lines with Elmer's Glue All that I found in a random kitchen drawer and allowed it to dry overnight.


Whenever trying something new, I'm always crossing my fingers that my "brilliant" idea will work.
Sometimes they're not so brilliant after all.

 The next morning I was disappointed because I couldn't see the glue anymore, but then pleasant surprised when I realized it dried clear.  (Duh moment)  I primed with cover stain primer (VERY IMPORTANT to use cover stain instead of regular primer for laminate surfaces) and painted with leftovers from other projects.


A definite must for me for another project sometime in the future.

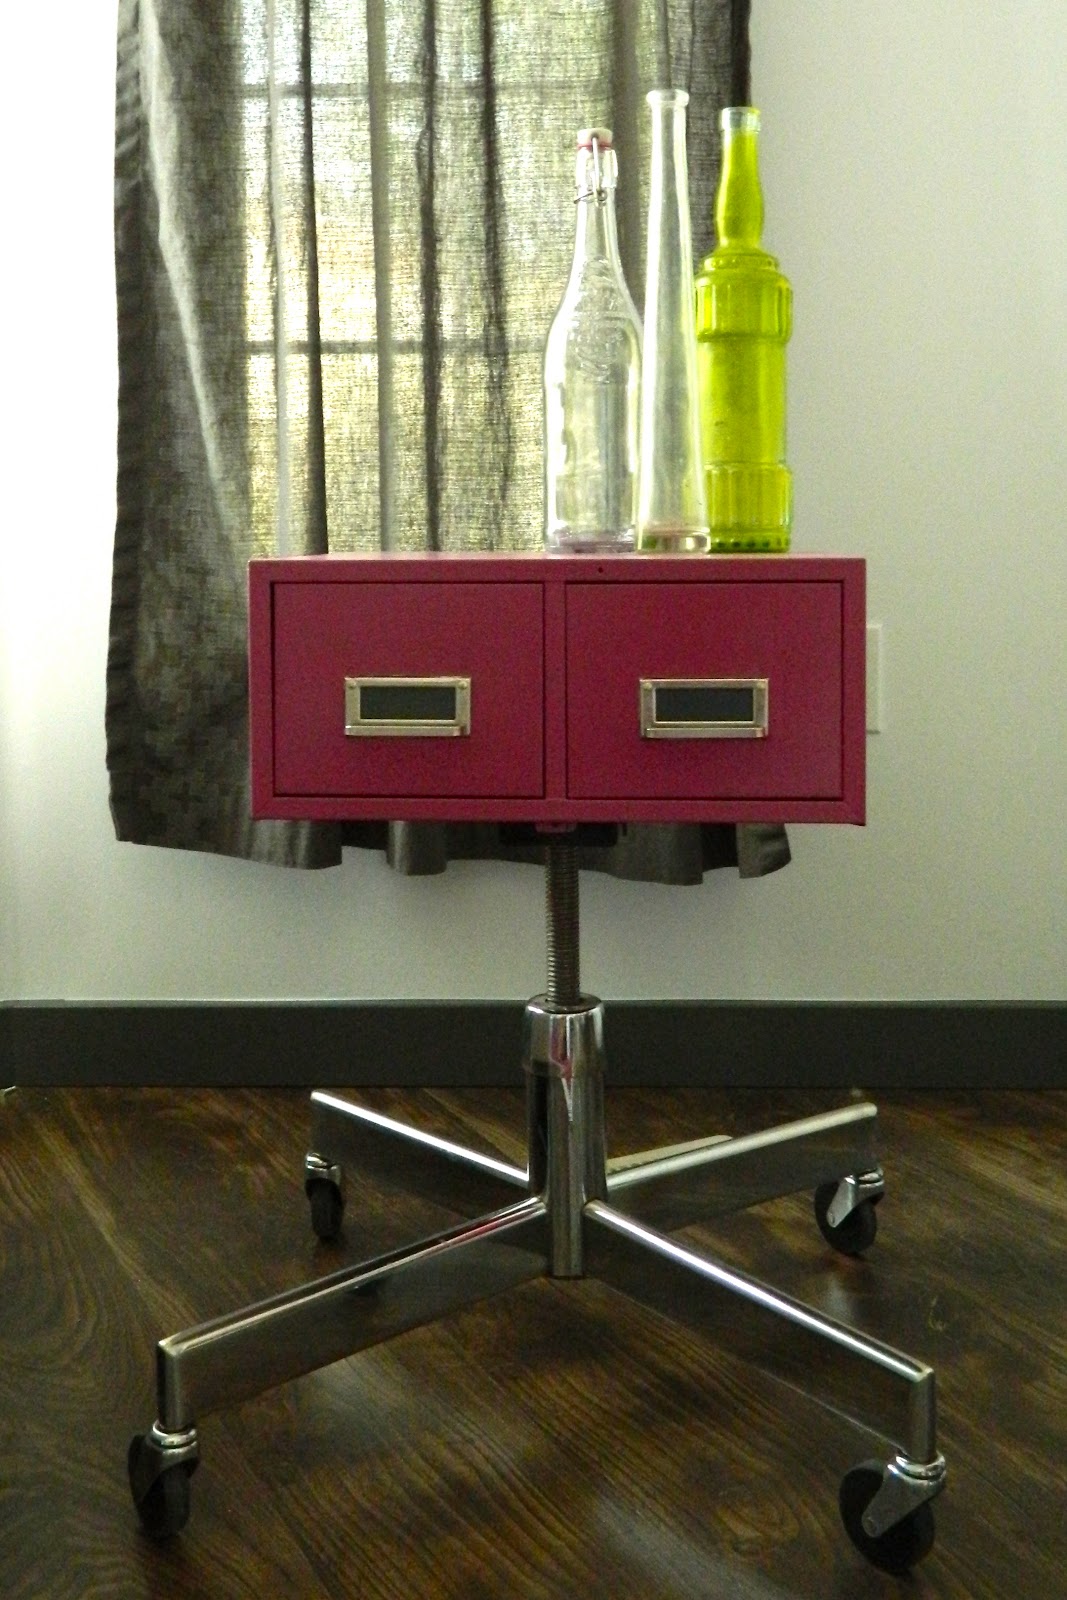
I decided to paint the inside of the drawers too.

This will be my new storage for smaller Christmas ornaments so I won't have to lug everything back down to storage year after year.


Have you given new life to an old and tired credenza recently?  I want to see!


Coming Soon...

Mish Mash Part 2: Dining Room Reveal


xoxo,

~*Abigail*~

Wednesday, May 15, 2013

Mish Mash Part 1... Formal Living Room Reveal


If you know me well, you'd think that my formal living room - the first room you lay your eyes on would pop out crying, "Look at me!  Look at me!"  Well... you thought wrong.  This room was one of the biggest challenges I've faced in my home to date.  Creative block after creative block, as I attempted to fill this room, it accumulated random decor and cast-off furnishings from the family room.  I avoided this area as much as I could.  You'll see why below...


Eww

I've sold off the entire sofa set on KSL Classifieds.  I kept insisting to the hubby, "Just get it out of here!"

My very first overpriced wall decor purchased from Tai Pan Trading.
This will stay in storage until I can figure out what to do with it.

With the eviction of the bulky everybody-has-one-just-like-it-sofa set, I became more aware that there was so much more potential with the room.  The space is 12' x 16' and holds a 16' high ceiling, recruiting Mr. Smitten for some help with brainstorming was a definite must.  We both agreed we didn't want our home to look like the everybody else's.  We craved for some personal touches that were unique to our taste: Extremely eclectic since we love all types of decor.  A major factor in this renovation was as always, budget.  We had some pretty hefty changes to make aside from the decor, that we had to make sure that we didn't break the bank.


So without any further delay, here is our Formal Living Room...

Have I caught your attention yet?
The only "brand new" purchases from this room are the paint, trim, flooring and faux plant (that came free with the flooring).  Everything else was either previously displayed in another room of the house, second hand from the classifieds, swap meet or thrift store.  I just added my own little oomph touches to make them look like they always belonged together.

Our Conversation-Starter/Wow Factor piece of art
I needed to "man down" all of the fuchsia coloring and searched for the perfect tufted masculine leather sofa.  Found it!  And I only had to shell out $100.

The records were purchased from a Swap Meet in the next town over in Riverdale for $1 each.  A 4'x8'x 3/8" piece of particle board, an old plastic gas price number ($0.75) and some leftover paint was all it took to make this art project a blast for the hubby and I.  This piece represents our love of music.

Finally, window treatments!

Nothing's better than a FREE monstrous sized piece of furniture that I can paint and get creative with!

My love for vintage knick knacks will never fade.


I love how Mr. Smitten will bring home great finds because he knows I'll fall in love with them.  The top left frame is now a home to a 1930s postal railroad route map he found while on a job at the very old Los Gables Apartments in Salt Lake City.


A project I will share with you very soon.

$1 globes I decided to hang from the ceiling on a whim


More frames and stunning original photography I discovered while browsing in a thrift store.


In a couple of weeks, I'll reveal the final result of my Kitchen and Dining area.  It's about 95% complete.  Just a few final touches...

Here's a reminder of the progress...
Original cabinets, flooring and counter tops - never a good idea to put three types of ugly together.

I never hated this decor, just grew bored with it.

Getting a little better..

Major improvement, but still not loving it.

Back to my formal living room, we've definitely met our goals:

Stayed within our budget
Got out of the Cookie Cutter Brown Color Scheme
and of course
Added whatever the hell we felt like and made the space ours.


xoxo,

~*Abigail*~