Wednesday, August 1, 2012

Guest Blogger: Lisa... on Organizing and Storing Your Painting Supplies


Hey there, Smitten readers!  I have a treat for you today!  Organization expert, Lisa is going to teach everyone a little somethin somethin about organizing your messy paint cans and paint brushes (Yes, I'm talkin to YOU!).


Lisa believes in the power of storage units when they are used properly. She currently organizes storage units in Virginia Beach and Tallahassee.   Take it away, Lisa!


Source


Visit any home decorator’s abode and it won’t take long to find the paint stash. There are some that stack everything up until you have the leaning tower of paint cans, and others spread things out to make it seem like less of a mess. If you fall into one of these categories (or another messy one) then it’s time to get your painting supplies under control. 

Prepare for storage the right way
If you’ve ever reused paint, you know there is a right way and a wrong way to prepare it for storage. The wrong way usually involves just sticking the top on and stowing the can away.  Instead, you should take these few steps to increase the life of the paint. First, cut a circular piece of foil or wax paper and gently set it down to float on top of the paint. This will make sure you don’t have to deal with a filmed over top when you open the paint up again. Next, clean off the rim of the can completely and put the top back on. There’s nothing worse than struggling with the top of a can after the paint dries and seals it like super glue!

Source


When it comes to the paintbrushes you should also make some extra preparations. First, remove all the paint from the brush. If you’re using latex paint you can use water to get the paint off, and for oil paint you can use paint thinner. Once the paint is gone, clean off the solvent with soapy water and set the brush out to dry. After everything has dried out you can wrap the bristles of the brush in plastic wrap or newspaper to keep out the elements. Once you’re prepared to store, it’s time to get organized.

Organize and store
Now you’re ready to organize the paint and store it. Your paint should be stored somewhere with relatively constant temperatures where the kids can’t get to it. The garage is usually a good place, especially if it’s climate controlled. Depending on your home, you might also be able to use a basement or utility area for storage. I have a paint locker that I created from an old armoire, but anything with shelves will do. I like to break the organization down by paint type and color. All the latex paint goes on one shelf, all the oil on another, and all the specialty stuff goes on the last shelf. 

Source

You can store brushes in a variety of ways. I bought two hanging organizers that are similar to the shoe organizers you hang on the back of doors. I have one on the inside of each door to the armoire, one for each kind of paint. The brushes and other tools that get used with the “specialty” items go in old mason jars on that shelf. 

 +      


Now you’re ready to organize your painting supplies. Good luck!

So are you ready to take on that jumbled mess that you hide away when company comes to visit?  I definitely did!  Thank you so much to Lisa for these great ideas on organization!  We all hope to hear from you again!

So what organization project is troubling you?  Leave a comment and you might see some hopeful tips in the future.

~*Abigail*~


Saturday, July 21, 2012

Getting Antsy... The Planning Stage Has Begun

No, I'm not dead - nor did I hit it big with the lottery and moved away to a mansion where I sit sipping on margaritas, poolside all day long.  Quite the opposite, actually.  I am very much alive, still not a millionaire and have been slowly saving up my hard earned moola for my next room makeover.  I just couldn't figure out which room to attack.  It shouldn't have taken me this long to choose, since the answer was so obvious once I finally thought of it.  I pass by this room every day, three to four times a day.  I don't spend much time in it because well...  It pains me to look at it since it utterly bores me: a jumbled, no theme room with no oomph factor.  So finally, I have begun the planning stages of my Formal Living Room.


First, let's pick apart this not-so-larger-than-life space, shall we?

Oh, I'm sorry!  Did I just walk into another person's house?
Nope, it just looks like the same ol color scheme as every one's house in a twenty mile radius.

Still no window treatments...  Booooring!!

What look was I going for, exactly ?  I'm not sure myself!
*Yawn*
My very first overpriced wall decor purchase.
So overpriced that I'm going to have to move this to another room for a future project, I'm sure.

I'm not big on giving too much away (where's the fun in that?), but yes, I have chosen my 10% of the 60/30/10 rule.

Chartreuse

Oooohhh yeah...  This is going to be fun.


~*Abigail*~

Sunday, April 15, 2012

Come and Stay Awhile... Guest Bedroom Reveal

Did everyone have a fantastic weekend?  Mine was extremely productive - So happy to have some energy back!  Those commutes to and from Salt Lake City have been whooping my arse for the last few weeks and the result was = no result... for anything!  

During my last reveal, my Living Room, I mentioned that I began yet another makeover project: the destination o' junk, future guest bedroom.  I felt bad that I often sent my guests to the sofa or to the den where a blow up mattress would deflate over night (sorry, Alex and Joyce!).  

Before

Due to budget restrictions, this took a little over a month and a half to complete.  Being the impatient person I am, this delay was utter torture for me!  Bad host, no more!  I present to you....

Our Guest Bedroom

I was giddy with joy this morning when everything fell into place.


What did we change, you ask?

Painted the room three different colors: 

Top Half: Treasured Moment by Glidden
Middle Strip and Trim: White
Bottom Half: Bali Hai by Glidden
To see where I got my inspiration see my Color Palette Inspiration post.

Installed new flooring

Threw away the "booby" light fixture and installed a new, more classic one.

Made my own headboard

Added some guest friendly furniture and fixtures

and of course... eye candy.


There's also an open bar in the kitchen, if sparkling water doesn't cut it for you.
 Now this room is fairly small.  It's 9' x 10', so purchasing a separate vanity was a no-go.  But where were my guests suppose to get ready?  I don't feel like having to share my own vanity in my Master Suite, no matter how wonderful my friends are.  Yeah, I'm kinda selfish like that.

No hurdle is too large, I say!  Let's just make one and still have room!

The most inexpensive built-in ever made!  Bookshelves, which I painted white : $20 ea from Walmart, 1' x 4' piece of wood and mounting pieces: $10 from Lowes = $50!!!  What?!  That's so cheap, it's obscene!
Stool: $5 from IKEA, Mirror: $35 from Ross

Just enough space for makeup and jewelry storage.
 Just a little bouquet I threw together from my tulip explosion is the front yard.

I am *smitten* with this journal!  My out-of-town visitor, if he/she chooses can write about his/her Utah experience and also use it as a mini scrapbook.

Lovin this fab $3 vase from Marshalls.

Aren't the pugs cute?
 Ever since my Living Room makeover, I've been eyeing the oodles of chinoiserie decor everywhere!  Maybe it's a phase of mine, maybe not.  Either way, I think they're fantastic!

Did you know the "Foo-Dog" is actually a "Foo-Lion"?  I like to research all that I'm obsessed with.

Touch of vintage and Asian-flair.
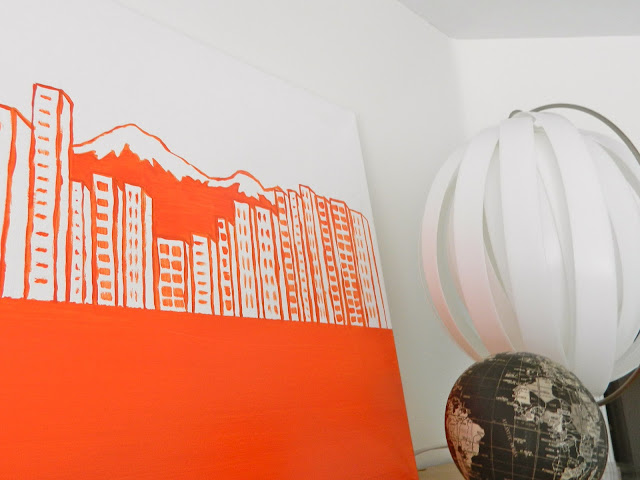
Just a little sumpin sumpin contemporary that I whipped up.
In Utah, you can have both city and excellent mountain scapes at the same time.


I made sure to include all of Mr. Smitten and my fave books.

My Maple tree and a few snips later.... instant jumbo vase filler and money saved!

My very first upholstery job.  Not perfect, but damn proud of it!
$35 elephant garden stool from Ross

...and one of my favorite decor magazines has made its home on top of it.
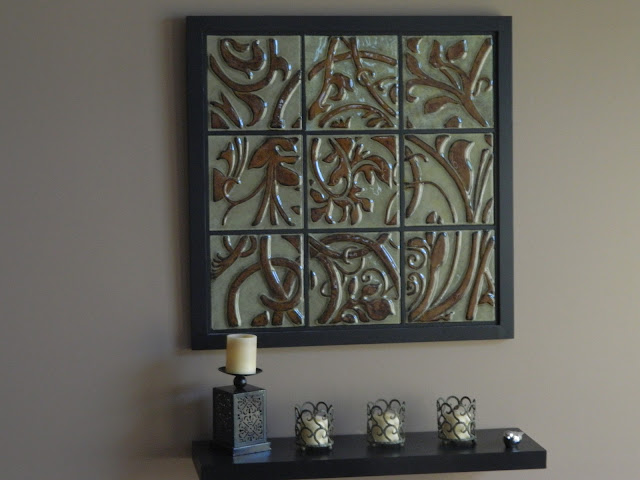
 Do you remember my mentioning that I HAD TO incorporate laser cut metal into this room, I just didn't know how?  It's kismet, I tell you!!  On my first trip to Homegoods after I had posted just that... I find this magnificent piece of art..

I find myself humming "Isn't she lovely.." every time I'm around her.

My favorite lamp to date.
A note to friends and family extremely missed by moi, this is for you.  


Come... and stay awhile....

~*Abigail*~


Linking up to Tip Junkie's Tip Me Tuesday
 <a href="http://tipjunkie.com/" target="_blank"><img src="http://www.tipjunkie.com/images/TipMeTuesdayButton1.png" alt="Tip Junkie handmade projects" border="0"/></a> 

Sunday, April 8, 2012

DIY Headboard Tutorial

I know..  I feel terrible!  I've neglected all of you for a few weeks now and I promise I have a real honest-to-god excuse.  I just acquired a position at a new insurance firm in Salt Lake City.  That means, my commute everyday is much longer and more exhausting.  I come home from work and crash out after dinner.  I've only been able to work on a couple of projects here and there if I can keep my eyes open.  My body is slowly adjusting to getting up at the butt crack of dawn... so I promise.. soon I will be back in full force!

About a month ago, I took a gander into the cutest little home decor shop in Historic 25th Street in Ogden, UT and had my breath taken away with all the gorgeous furniture and accessories.  Once I spotted these babies, I made a beeline for them.  I needed a headboard for my guest bedroom and pronto!


My breath was taken away again... by the high price.  Yikes!  No can do.
  

So, the DIY gears in my head started turning...  and I made my own headboard for a total of $25!  You wanna try it out for yourself?  Here's what you'll need:

Mattress Foam Pad from Wal-Mart 
Plywood or particle board cut to size
2 - 3 yard fabric (I bought mine from the clearance section at Joanne's)
Staple gun
Plenty of staples
Scissors
20 - 30 minutes (Seriously)


Love the fabric!  It's faux leather.
 Step 1: Staple on Foam Pad

Back

Front
 Step 2 (optional) : Staple on Batting.  I decided not to because I wanted some of this funky foam design peeking through.

Step 3: Staple (make sure it's taut) on fabric

My camera's not doing a very good job tonight.  You can hardly see the details, but it's looking pretty awesome!
 Step 4: Hang it up!!

Okay, I couldn't take a picture further back because then I'd be giving away too much of my Guest Bedroom Reveal.  I'm just putting the finishing touches to the room and I'll show you everything sooner than later, I hope!

I may be adding a bit to this headboard sometime in the future.

Good night, all!  I gotta get some shut eye if I want to beat that morning traffic!

xoxo,

~*Abigail*~

Friday, March 23, 2012

Guest Blogging with Style... and Stardust

Is everyone so psyched that the weekend is finally here?!  I am!  I have major plans for this weekend and all I can hope for is that I can accomplish 5 of the gazillion items on my list.  Since one of my plans is to finish up the guest bedroom project, I don't currently have a reveal to share with you.  I do, however have some exciting news.  Olga from Stardust - Decor & Style has asked me to create a guest post for her blog today.  I am super psyched and humbled that this fabulous blogger had even noticed my still-wet-behind-the-ears site.

S t a r d u s t  -  Decor & Style

Just a warning, if you check out her page, you will not want to leave!  It is jam packed with amazing transformations and tips by Olga and other guest bloggers like myself.  Here are a couple of my personal favorite posts by Olga:

Her Living Room - I heart the eclectic vibe going on
Her Hallway Transformation - Oh my goodness!  I may just have to "borrow" this idea somehow.

A HUGE thank you to Olga for offering me a guest post spot on her Amazing Blog!  So, take a gander and don't say I didn't warn you!  Very addictive!

~*Abigail*~

Tuesday, March 20, 2012

The Comeback of Paintable Wallpaper... Refinished Sidetable

Happy Tuesday!  I'm taking a week break from work and I am getting loads on my to do list crossed off.  It's amazing what 7 hours of no work and my daughter sent off to school will give me: precious alone time.  I am definitely taking advantage of it.

Did I ever tell you how much I love HomeGoods?  Did I?  Did I?  Oh yeah, I have...plenty of times.  Well, let me tell you again - I LOVE HOMEGOODS!  It seems I never walk out of that store empty handed.  During my last trip, I snatched up this baby before anyone else can see the unbelievable clearance tag attached to it.


I whistled and sang some happy "I just scored the best deal ever" tunes during my drive back home.  As I set her down inside the house, I saw this:


A humungo chunk of glass was missing from the bottom drawer!!!  Whhhaaaaaat???  By the time realization had set, I was fuming and bewilderedly yelling, "I can't afford to have that drawer face replaced!" (It's about a hundred bucks around here, kiddos - no joke)  "I can't fix that myself!"...or could I?
I had a light bulb moment and decided not to sweat the minor detail any longer.

Do you remember my Executive Desk Makeover?  I used a paintable wallpaper by Allen & Roth to cover up all the ugly.  I decided this is what's going to save that side table from being smashed into tiny bits from my frustration.

56 sq ft for $17 at Lowes.

I decided on covering all the drawer faces with this fabulous design.  I still have tons of this wallpaper left over from my desk project and I only needed to use a small portion of it.

Yes, I did this while watching some HGTV in my Living Room

 After some careful consideration, I opted to keep the wallpaper white.
 Here she is.  I do believe she looks even better than the original all glass design.  I've set her up in her temporary home in my formal living room until another room is all finished (hint: starts with Guest, ends with Room).

This took approximately 30 minutes from start to finish.

Now I can continue onto my happy dance...

~*Abigail*~

Wednesday, March 14, 2012

Where Did They All Go? Entertainment Organization Solution

I know, I know...  I haven't posted anything in over a week now.  It's been a little crazy around the Smitten household and I have finally found some down time to share a couple tips with you.  As you all know, coming up with an organizational master plan is not my area of expertise.  That's where my sister, Winnie from Fam Och in the Yukon steps in.  I am the one to find a gorgeous piece of furniture that I MUST buy and she is the one to ask "So... what's it for?"  "Isn't it pretty?" just won't cut it.  It must be functional to be top notch.  

In this instance, I found a small mirrored dresser for my Living Room and wasn't sure how I was going to fit all of my dvds into one dresser drawer since Mr. Smitten's gaming systems and video games already occupied two of them.  I was stumped and needed help.


Naturally, I called the organization guru and asked for a solution...


You've got to check out her ideas and tips on how to keep all that clutter organized and out of sight!  They work for any decor whether you are traditional, eclectic or modern.  Her post also shares pictures of the outcome of my dvd system.  

Also, stay tuned!  I have been asked to be a guest blogger over at the fabulous Olga's blog, Stardust - Decor & Style on some of my transformations.  I heart her blog!

~*Abigail*~

Sunday, March 4, 2012

Color Palette Inspiration

It's Monday again tomorrow, folks and I wanted to close this weekend with a bit of sharing.  I've received a few emails from my fabulous followers asking me how I came up with the color palettes for each room makeover reveal that I've posted.

Do I go straight to my paint swatch book and start to randomly choose colors?   

source
It helps quite a bit to tie all of my ideas together, but no, that's not where I pull inspiration from.  

I am inspired everyday by everything!  I am very observant by nature and what I'm drawn to, I catch it and keep it locked in my noggin (or my trusty iPhone camera roll) for safekeeping until it's ready to be put to use.

For my guest bedroom, I have a few key inspirations I'd like to share with you...

I've never been one to ask for jewelry as a present - that's one area of my life that I'm not too fussy about.  I have, however (for no apparent reason at all) always been smitten with these dainty little boxes and perfectly tied bows.  

source
I absolutely love to garden!  There's something calming about being by myself and getting my hands elbow deep in dirt.  One of my favorite flowers is the tulip.  Although they don't last more than a few weeks here in Utah, I can always count on them to come back year after year to show me that warmer days are ahead.  As I was at Lowes the other week, I noticed a bag of bulbs with the prettiest orange and asked myself why I had never planted these.  Too late for the season, but not too late for a color add-on for the guest bedroom.

source

After a much exhausting trip through Ikea on a Sunday afternoon, I bought my daughter a special treat for being so patient with me through the never ending arrows in that store (Mighty clever of them to have a snack bar located behind the cash registers).  Instead of giving in and buying one for myself, I noticed how simple, yet classic the color of vanilla ice cream was.

source

With the technology we have today aka: the internet, you can't help but surf through thousands, if not millions of random pictures.  I came across this amazing piece of decor.  The design wasn't what I was drawn to, but the process it took to get to the finished product.  I am loving laser cut metal right now and I plan to somehow (no clue yet, but my determination never fails me) apply this to the scheme.  
source

So there ya go.  A tiny insight on what makes my interior decorator heart skip a beat and a sneak peek of what my guest bedroom is going to look like.

Your turn!  Take a look around and tell me... 
What inspires you?

~*Abigail*~